Why Internal Aircon Dirt Cannot Be Removed With Surface Cleaning

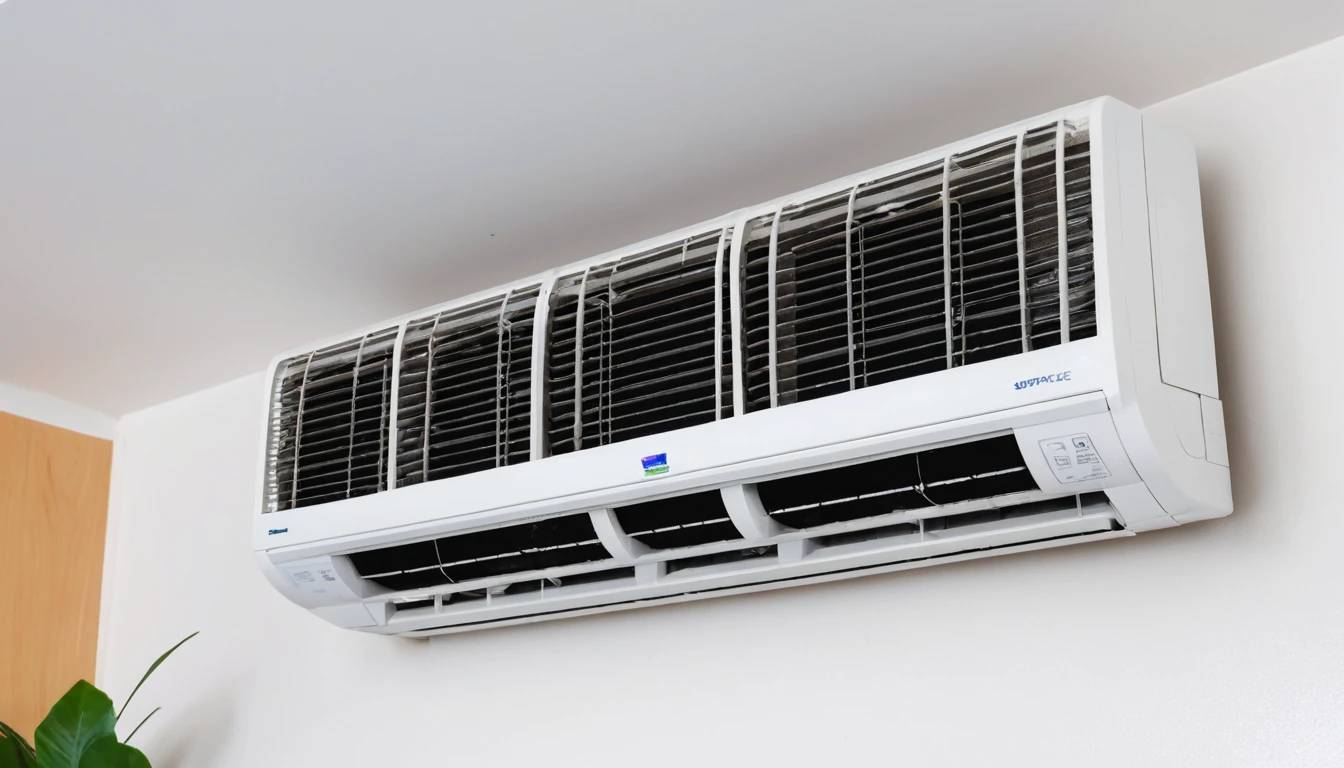
Internal aircon dirt forms deep inside the unit where air flows through coils, filters, and internal chambers. This dirt collects from dust, moisture, and airborne particles. The buildup sticks to hidden parts that the eye cannot see. Surface cleaning touches only the outside panels and open areas. It does not reach the core sections where the real buildup grows. Internal aircon dirt affects airflow, reduces cooling strength, and creates unhealthy air. The problem grows over time because the dirt settles layer by layer inside the closed system. This process shows why a simple wipe or quick surface cleaning cannot remove the trapped buildup inside the air conditioner.

Why Surface Cleaning Fails To Reach Internal Buildup

Surface cleaning focuses on the parts of the aircon that are easy to reach, such as the cover, visible vents, and external edges. These areas collect dust, but the deeper parts hold heavier and more stubborn internal aircon dirt. Many homeowners look into aircon servicing in SG when they realize that surface cleaning cannot remove buildup trapped inside the system, especially in spots where airflow pulls particles through tight spaces that basic tools cannot reach. The coils, blower, and internal pathways hold moisture, which causes dirt to stick more tightly. A cloth or light spray cannot reach these sections. As a result, the dirt remains inside the unit and continues to grow even though the outer surface looks clean. This gap between visible cleaning and real internal needs is the main reason surface cleaning fails.

How Internal Aircon Dirt Affects Performance

Internal aircon dirt blocks airflow and reduces cooling output. When the coils hold thick layers of dirt, the system cannot transfer heat properly. The compressor works harder and uses more power. The blower pushes air through narrow, dirty spaces, which weakens the flow. The unit begins to make louder sounds because the dirt affects moving parts. Cooling becomes slow, uneven, and inconsistent across the room. The buildup also increases strain on electrical components. These effects show how internal dirt impacts the unit far more than any surface dust. A clean outer shell cannot improve these deeper issues because the real blockage sits inside the system.

The Hygiene Risks Linked With Internal Dirt

Internal aircon dirt holds moisture, bacteria, and fine particles. The closed environment inside the unit creates conditions that support harmful growth. When the aircon runs, the blower spreads these particles into the room. This can trigger allergies, breathing issues, headaches, and throat irritation. The moisture inside the system can also cause mold growth, which spreads unhealthy spores into indoor air. Surface cleaning does nothing to remove these hidden contaminants. The visible surfaces may look safe, but the core of the unit continues to release unhealthy particles. This risk shows why internal cleaning is important for safe indoor air.

The Difference Between Surface Cleaning and Internal Cleaning

Surface cleaning focuses on external areas, while internal cleaning goes inside the structure of the unit. Internal aircon dirt sits behind panels, inside drain channels, around coils, and inside the blower. These areas require a deep cleaning process that opens the unit and reaches closed sections. Surface cleaning uses light tools meant for appearance. Internal cleaning uses steps that remove dirt from functional areas that affect performance. This difference explains why the two processes deliver very different results. Cleaning the surface improves looks, but internal cleaning restores function and hygiene.

Why Internal Aircon Dirt Needs Proper Access

Internal aircon dirt hides in narrow spaces that can only be reached by opening the unit or using specialized tools. The blower wheel, evaporator coils, and drain pan sit behind layers of internal structure. These parts move air and remove heat, so dirt on them creates serious blockages. Surface cleaning cannot reach them because they sit deep inside the housing. The unit needs proper access to remove all layers of dirt. Without full access, the cleaning job remains incomplete. The dirt continues to affect cooling strength and air quality even if the surface looks clean.

How Dirt Builds Faster Inside Than Outside

Internal areas collect dirt faster because of constant airflow and moisture. The aircon pulls dust from the room and traps it inside. Moisture from condensation mixes with this dust and forms thick layers. This buildup grows faster in internal parts than on outer surfaces. Surface cleaning wipes dust that settles lightly, but the dirt inside forms heavy deposits that cling to metal and plastic. The deeper dirt forms clusters that block systems and reduce efficiency. This pattern explains why the internal problem grows even when the outer area seems clean.

Why Relying on Surface Cleaning Increases Long-Term Damage

Surface cleaning gives a false sense of maintenance because the unit looks clean from the outside. But internal aircon dirt continues to thicken and cause long-term wear. The compressor works harder, which shortens its life. The coils struggle to cool air, which increases power use. The blower strains against clogged sections. These issues raise repair costs and shorten the overall lifespan of the unit. Surface cleaning does not protect against these problems because it does not address the internal buildup. This oversight leads to higher expenses and weaker unit performance over time.

Internal Dirt and Its Impact on Energy Use

Internal aircon dirt forces the system to use more energy to achieve the same cooling result. When the coils are blocked, the unit needs more time and power to cool the room. The blower consumes more power because it works harder to push air through narrow dirty channels. These issues create high energy bills even if the outer surface appears clean. Surface cleaning cannot improve this because the internal parts remain blocked. Only proper internal cleaning can restore efficient operation and help lower energy consumption.

The Role of Moisture in Holding Internal Dirt

Moisture plays a major role in trapping internal aircon dirt. The evaporator coils produce constant condensation. This moisture sticks to dust and creates a thick layer of grime. The layer hardens over time and becomes difficult to remove through simple cleaning. Surface cleaning does not reach these wet areas inside the system. The moisture stays trapped behind the panels, building more and more layers as the unit runs. This process shows why internal dirt cannot be treated with anything that only touches the outside.

Why Visible Cleanliness Does Not Equal Internal Cleanliness

An aircon may look clean from the outside, but internal cleaning tells a different story. Most dirt sits inside areas the user cannot see. A shiny surface gives the impression of a well-maintained unit, but the internal aircon dirt continues to block airflow and reduce cooling. Relying on visible cleanliness leads to poor indoor air and weak performance. The hidden parts influence how the unit works far more than the outer layer. This difference makes surface cleaning unreliable for understanding the true condition of the system.

How Internal Dirt Leads to Odors

Internal aircon dirt mixes with moisture and forms odors that spread when the unit runs. The smell comes from bacteria, mold, and dust deposits stuck in internal parts. Surface cleaning does not reach the areas where these odors form. Wiping the outer vent or cover does nothing to remove buildup from the coils or drain pan. The odor returns each time the unit starts because the source sits deep inside. This issue shows how internal buildup affects comfort and indoor air freshness.

Why Internal Cleaning Extends System Life

Internal cleaning removes the dirt that strains key components. Clear coils improve heat transfer. A clean blower improves airflow. A clear drain system prevents water leaks. These improvements reduce stress on mechanical and electrical parts. Surface cleaning cannot offer these benefits because it reaches only cosmetic areas. Internal cleaning helps the system last longer by reducing strain and preventing damage from trapped dirt.

Conclusion

Internal aircon dirt forms inside areas that surface cleaning cannot reach. The buildup affects airflow, cooling strength, hygiene, energy use, odor control, and component life. Surface cleaning improves appearance but does not solve performance issues. The real problem sits inside the system where dust and moisture combine to form thick deposits. To maintain proper cooling and safe indoor air, internal cleaning is necessary. This process removes the dirt that causes long-term damage and restores the aircon’s ability to deliver clean and steady performance.

Top Things to Do on a Private Sailing Trip in Puerto Vallarta

A vacation in Puerto Vallarta offers a calm setting, clear water, and a wide range of activities for travelers who want a private yacht experience. A private yacht gives you space, comfort, and control of your schedule. You can enjoy a luxury cruise vacation with simple plans and clear choices that match your interests. This guide explains the top things to do on a private sailing trip in Puerto Vallarta. It also shows how each activity adds easy value to your trip and helps you enjoy a smooth and direct experience on the water.

Enjoy the View of Banderas Bay

Banderas Bay offers wide ocean views and steady weather that help you enjoy your private yacht experience. You can relax on the deck, breathe fresh air, and watch the water move in a steady and calm way. Many travelers choose this area for their vacation because the bay gives a clear and open space for smooth sailing.

Watch the Coastline

The coastline around Puerto Vallarta shows green hills, clean beaches, and quiet shore areas. A private yacht lets you move closer to the spots you want to see. You can take photos, sit on the deck, or enjoy the slow movement of the boat while the coast stays in view.

Spot Marine Life

Banderas Bay brings many types of marine life. You may see dolphins near the boat. You may also spot sea turtles or rays at the surface. Some months allow whale sightings as well. A private yacht gives you a steady spot to watch these animals in their natural setting without noise or rush.

Swim and Snorkel in Clear Water

Puerto Vallarta offers many areas with clean and clear water that support swimming and snorkeling. These stops help you stay active during your luxury cruise vacation and give you simple access to the water.

Visit Los Arcos

Los Arcos sits near the south side of the bay. The area includes rock arches and small caves. The water stays clear and calm. You can swim or snorkel here and see fish of many colors. A private yacht gives you direct access to this spot with ease and comfort.

Explore Hidden Beaches

Puerto Vallarta in Mexico offers many small beaches that stay quiet and less crowded, giving travelers a peaceful place to enjoy the ocean. When you book a Puerto Vallarta yacht charter, your captain can guide you along these calm coastal spots and stop near hidden bays where the water is clear and inviting. This creates a smooth and easy experience, letting you swim, relax on the sand, or simply enjoy the open view without noise or interruption.

These calm beaches make your private yacht trip feel more personal and flexible. You decide how long you want to stay at each location, and you choose the activities that match your mood. Whether you want a slow swim, time on the sand, or a quiet moment on the deck, the coastline of Mexico gives you plenty of space to enjoy your day with comfort and simplicity.

Relax on a Luxury Cruise Vacation

A private yacht gives you space to slow down and enjoy calm moments. This part of the trip supports travelers who want peace, comfort, and a break from busy city settings.

Enjoy Onboard Comfort

A private yacht includes soft seating, open decks, and simple design. You can rest under the sun, read a book, or talk with your group. The crew handles the work while you enjoy your vacation without stress.

Enjoy Food and Drinks

Many private yacht trips include fresh snacks, drinks, and light meals. You can enjoy cold drinks while watching the water. You can also ask for simple food choices that match your plans for the day.

Visit Puerto Vallarta’s Top Coastal Spots

A private sailing trip gives you access to coastal spots that stay popular with travelers. Each location offers clear activities that support your vacation goals.

Yelapa

Yelapa sits south of Puerto Vallarta. You can reach this area by boat only. The beach offers soft sand, open water, and small local shops. You can swim, walk around, or sit at a beach table. A private yacht makes the visit simple and gives you control of your time.

Majahuitas

Majahuitas offers calm water and a quiet beach area. Snorkeling here shows fish of many shapes and colors. Many travelers choose this stop during their private yacht experience because the water stays clear, and the area feels peaceful.

Las Animas

Las Animas has a long beach lined with small restaurants. You can swim or sit on the sand. The area supports travelers who want a mix of activity and rest during their luxury cruise vacation.

Try Water Activities from Your Private Yacht

Your private yacht gives you fast access to water activities that add fun to your vacation. The crew can help set up simple gear and show you clear steps to enjoy each activity.

Paddleboarding

Paddleboarding works well in calm areas of the bay. You can stand, kneel, or sit on the board. This activity gives you a slow and steady way to enjoy the water near the yacht.

Kayaking

Many private yacht trips include small kayaks. You can paddle near the shore or explore small coves. This activity supports active travelers and gives you control of your pace.

Light Fishing

Some guests enjoy simple catch-and-release fishing. The crew can provide easy gear and basic tips. You may catch small local fish near the deeper water.

Take Photos During Your Trip

A private yacht offers open space and bright light that help you take clear photos. Many travelers enjoy photography during their vacation in Puerto Vallarta because the area offers water, sky, and coastline all in one frame.

Sunrise and Sunset Views

The bay offers clean sunrise and sunset views. You can take photos from the deck while the sky changes colors. This moment fits well with a luxury cruise vacation because it adds calm and beauty to the day.

Water and Coast Photos

You can take photos of the coastline, marine life, or your group on the yacht. These photos help you remember your trip and share your private yacht experience with family and friends.

Spend Time on a Beach of Your Choice

A private yacht allows you to stop at beaches that fit your plans. You can choose busy beaches with more people or quiet beaches with fewer visitors.

Beach Time for Relaxation

You can sit on the sand, walk along the shore, or swim in the shallow water. This simple activity supports a clear and peaceful vacation plan.

Local Beach Food

Some beaches include food stands or small restaurants. You can try fresh seafood or cold drinks. This adds a light local touch to your private yacht trip.

Explore Puerto Vallarta by Water

A private sailing trip gives you a new view of Puerto Vallarta. You see the buildings, hotels, hills, and shore from the water, which gives a wider sense of the area.

View the City Skyline

The skyline shows hotels, condos, and hills behind the city. You can take photos or simply enjoy the view as the yacht moves forward.

Spot Landmarks

You may see the church tower, long beaches, and popular resort areas from the water. These landmarks help you understand the city layout in a simple and clear way.

Plan a Full Day or Half Day Trip

Your private yacht experience can match your schedule. You can plan a short trip or a full day trip depending on your vacation goals.

Half Day Trip

A half day trip works well for travelers who want quick access to the water. You can swim, relax, or visit one beach before heading back.

Full Day Trip

A full day trip gives you time to visit more places. You can explore two or three beaches, swim in many spots, and enjoy long hours on the deck.

Create a Simple and Clear Itinerary

Planning your private yacht trip helps you use your time well. You can choose activities that match your interests and skip anything that does not matter to you.

Set Your Main Goals

You can choose simple goals such as swimming, snorkeling, beach time, or rest. These goals guide your schedule for the day.

Adjust as You Sail

A private yacht gives you freedom to adjust your plans. If you like a spot, you can stay longer. If you want to move on, you can leave at any time.

Final Thoughts

A private sailing trip in Puerto Vallarta offers clear choices, open space, and simple fun for travelers who want a private yacht experience. You can relax, explore beaches, swim in clean water, or enjoy quiet time with your group. A luxury cruise vacation in this area supports both rest and activity in a steady and easy way. With the right plan, your vacation becomes smooth, direct, and enjoyable from start to finish.

Why Tourniquet Speed Matters in Emergency Care

Tourniquet speed impacts the outcome of Emergency Care. A fast response helps control heavy bleeding. A clear process also helps medical teams work with confidence. This article explains why quick tourniquet use matters, how it supports patient safety, and how trained actions improve results in critical moments.

The Role of Tourniquet Use in Emergency Care

Tourniquet use supports bleeding control during severe injury. Heavy bleeding reduces oxygen supply in the body. A fast tourniquet application helps slow blood loss. Emergency Care teams act under pressure, so simple steps help them secure a better outcome. Speed also supports stability until the patient reaches advanced medical support.

Why Speed Is a Key Factor

Speed plays a direct role in patient survival, especially in fast-moving emergency settings where every second matters. A clear action plan helps responders apply a tourniquet with accuracy and confidence, reducing the chance of errors during high-pressure moments. Slow action increases risk, delays treatment, and can worsen bleeding. This is why many teams rely on dependable tactical medical gear from trusted providers like FlareSyn, as reliable equipment supports quick decision-making and steady hands when the situation becomes critical.

A fast tourniquet response also lowers stress for responders and supports smoother control in chaotic scenes. Quick steps help keep the patient conscious during transport and allow emergency teams to stabilize the situation before further complications arise. When responders have access to well-designed, high-quality tools, they can move with purpose, maintain momentum, and deliver lifesaving care with greater efficiency.

Impact on Blood Loss

Blood loss can rise in seconds. A tourniquet helps limit this loss. A fast response lowers the chance of shock. This step gives medical teams more time to treat the wound. Speed also helps avoid long-term health issues that come from delayed bleeding control.

Impact on Patient Stability

A controlled bleed supports stable vital signs. This stability helps responders move the patient to a safer area. Stability also supports a clear assessment of other injuries. The faster a tourniquet is applied, the easier it is to manage the next steps in Emergency Care.

How Tourniquet Use Supports Life-Saving Actions

Tourniquet use supports actions that protect the airway, maintain breathing, and support circulation. These steps form the base of Emergency Care. A fast tourniquet response helps responders focus on other urgent needs. It also helps reduce confusion during high-pressure events.

Help for First Responders

First responders depend on fast tools and steps. A tourniquet with a simple design helps responders act without delay. Many injuries happen in outdoor areas, roads, industrial sites, or public spaces. A tourniquet placed within seconds supports the best outcome. This action reduces fear, helps responders stay calm, and helps them follow a clear plan.

Help in Medical Transport

Transport teams also depend on bleeding control. Moving a patient can shift the injury. A secure tourniquet helps limit further damage. A fast application also prevents extra pressure during transport. Speed helps stabilize the patient while ambulances move through traffic or uneven terrain.

Why Training Strengthens Tourniquet Use

Training helps responders act quickly. Practice builds muscle memory. This helps people use a tourniquet in low-light, noisy, or crowded scenes. Training also supports clear judgment. Responders must decide when to use a tourniquet and how tight it should be. Training reduces errors and builds trust in the process.

Learning Proper Placement

Correct placement supports the goal of bleeding control. Training teaches responders to place the tourniquet above the wound. A fast and correct placement prevents extra harm. It also reduces the chance of needing multiple adjustments. A simple step-by-step method supports accurate responses under stress.

Learning Pressure Control

Pressure must be firm to stop blood flow. Weak pressure offers little help and delays treatment. Excess pressure may cause extra pain. Training helps responders find the correct balance. Practice also helps them check for bleeding after application. This clear feedback helps maintain confidence in the device and the process.

The Connection Between Time and Survival

Medical data shows the link between fast bleeding control and survival. The body loses strength when bleeding continues. Organs need oxygen, and blood carries this oxygen. A fast tourniquet application keeps the body supplied for a longer time. This gives medical teams the chance to deliver more advanced treatment when the patient reaches a hospital.

Seconds Make a Difference

Many injuries produce strong blood flow. Every second matters. A tourniquet helps slow this flow. A delay increases the chance of cardiac arrest. Fast action may prevent a fatal outcome. This is why Emergency Care teams practice speed with strict steps and clear tools.

Preventing Shock

Shock is dangerous because it reduces blood pressure. A fast tourniquet response helps slow the drop in pressure. This supports brain function and heart function. Preventing shock also reduces pain and confusion. A stable patient is easier to treat, easier to move, and easier to monitor.

Field Conditions and Tourniquet Speed

Field conditions often limit visibility and space. Rain, dust, noise, or darkness can affect response speed. A simple tourniquet design helps responders apply it without delay. Outdoor injuries often happen far from hospitals. A fast response supports patient survival during long transport times.

Response in Crowded Areas

Public scenes create pressure. Responders must act fast while working around people, noise, and movement. A clear tourniquet process helps control the scene. Fast action also shows bystanders that help is under control. This reduces panic and helps responders work with focus.

Response in Remote Areas

Remote areas lack quick access to hospitals. A fast tourniquet response becomes even more important. Long distances increase the risk of severe blood loss. A tourniquet applied in seconds supports stable blood flow until the patient reaches trained medical help.

How Tools Support Faster Application

The design of a tourniquet can support speed. Simple straps, clear grips, and strong materials help responders act with confidence. Emergency Care teams often test different devices. A device that offers strong results under stress supports better survival rates.

Visibility and Grip

A visible strap helps responders place it fast. A firm grip helps them tighten it without delay. These small features support speed in real emergencies. Clear instructions printed on the strap also help reduce confusion.

Durability and Strength

A strong material holds pressure longer. This prevents loosening during transport or movement. Speed depends on trust in the tool. Responders act faster when they trust the device to hold steady.

Training the Public for Faster Tourniquet Action

Public training programs help people react faster. Many injuries happen before trained teams arrive. If the public understands quick tourniquet steps, they can help control bleeding early. Early control supports Emergency Care teams when they reach the scene.

Simple Steps for Public Use

Public training uses short and simple steps. People learn to identify heavy bleeding. They learn to place the tourniquet above the wound. They also learn to tighten it until blood flow stops. These clear steps help reduce panic and support faster action.

How Early Action Helps Teams

Early bleeding control helps trained teams start advanced care sooner. It reduces confusion. It also reduces the workload on responders who arrive later. A fast public response improves the total Emergency Care process.

Why Tourniquet Speed Should Be a Priority

Tourniquet speed supports survival, stability, and clear responses. Emergency Care depends on quick action. A fast tourniquet response gives medical teams more time and gives patients a stronger chance to recover. Training, simple tools, and public awareness support this goal.

Building a Strong Response System

A strong response system uses fast tools, clear training, and confident responders. Speed helps reduce loss of life. It also supports a cleaner and more structured Emergency Care process. Fast tourniquet use remains a simple action with major impact.

Conclusion

Tourniquet speed plays a direct role in survival during heavy bleeding. A fast response supports patient stability, prevents shock, and gives medical teams more time. Training, clear steps, and strong tools help responders act with accuracy. Emergency Care relies on fast decisions, and tourniquet use is one of the core actions that protect life during critical moments.

How Specialty Pharmacies Improve Medication Access

Specialty pharmacies play a vital role in patient care. These pharmacies handle high-cost and high-need medication plans for chronic and serious conditions. They give patients clear support. They also help doctors and insurance teams manage treatment needs. The goal is simple. They make medication access easier, faster, and more reliable.

The Purpose of Specialty Pharmacies

Specialty pharmacies play an essential role in managing advanced medications that require strict handling, temperature control, and patient monitoring. These treatments are commonly used for serious conditions such as cancer, multiple sclerosis, and rare diseases, which often demand a higher level of oversight than what a standard pharmacy provides. Because traditional pharmacies may not have the systems or expertise to manage these therapies, patients depend on specialty services that ensure safe dispensing, proper administration guidance, and consistent communication throughout their treatment journey.

Many patients benefit from specialty support that offers education, coordination, and reliable access to sensitive medications. This is where Corpus Memorial Pharmacy provides meaningful value through its wide range of Corpus Memorial Pharmacy Services, helping individuals understand dosing, manage side effects, and stay on track with their care plans. By offering this type of structured and patient-centered assistance, the pharmacy creates a smoother experience and helps patients feel more confident and supported throughout their treatment process.

How Specialty Pharmacies Improve Access

Faster Approvals and Coordination

Specialty pharmacies work closely with insurance companies. They help reduce delays. They contact insurance teams and confirm coverage details. They submit paperwork for patients. This process helps patients start their medication sooner.

Clear Support for Medication Plans

Many patients feel stress when they start a new treatment. Specialty pharmacies provide simple instructions. They explain how to take the medication. They explain possible issues. They support patients with reminders and help them stay consistent with their treatment.

Help With High Costs

Some medicines are expensive. Specialty pharmacies guide patients on payment support. They connect patients with cost-saving programs. They help patients apply for financial assistance where it is available. Their goal is to lower financial pressure and keep treatment moving.

What Makes Specialty Pharmacies Effective

Strong Communication

Specialty pharmacies stay in close contact with doctors and patients. They make sure every step is clear. They confirm dose changes. They report updates to the care team. This steady communication helps prevent mistakes.

Reliable Follow-Up

Treatment for chronic conditions does not end after the first dose. Specialty pharmacies offer regular check-ins. They ensure patients take their medication as directed. They answer questions and help solve issues early.

Safe Storage and Delivery

Some medication needs special temperature control. Specialty pharmacies store and ship medication with secure packaging. They send orders directly to the patient’s home. This service keeps treatment safe and convenient.

Support for Healthcare Providers

Accurate Information Sharing

Doctors rely on updated treatment records. Specialty pharmacies send important updates. They share refill patterns and patient progress. This data helps doctors adjust treatment plans with confidence.

Less Administrative Work

Doctors often face heavy paperwork. Specialty pharmacies ease this load. They help gather documents, confirm coverage, and manage prior authorization steps. This process saves time and allows doctors to focus more on patient care.

Better Patient Experience

Personal Guidance

Patients often feel confused about medication schedules. Specialty pharmacies offer clear guidance. They use simple language. They help patients build a stable routine. This structure improves treatment success.

Easy Refill Management

Specialty pharmacies manage refills in advance. They monitor supply levels. They call patients before they run out. This service protects patients from missing doses and keeps treatment on track.

Education That Builds Confidence

Many patients want clear answers. Specialty pharmacies answer questions in a direct and simple way. They explain risks and benefits. They help patients feel more confident in their medication plan.

How Specialty Pharmacies Reduce Barriers

Handling Insurance Challenges

Insurance steps can slow treatment. Specialty pharmacies cut through this delay. They submit required forms. They confirm plans. They manage appeals when coverage is denied. Their support keeps patients moving forward.

Support for Complex Treatment Plans

Some patients take more than one specialty medication. Specialty pharmacies help organize each step. They align refill dates. They give clear instructions. This structure helps prevent confusion.

Encouraging Treatment Consistency

Missed doses can lower treatment results. Specialty pharmacies use calls, messages, and reminders to help patients stay consistent. This simple support leads to better health outcomes.

Technology That Strengthens Access

Digital Tools

Specialty pharmacies use secure digital systems. Patients can track their orders. They can request refills online. They can contact support teams easily. These tools reduce waiting time and improve convenience.

Data That Improves Care

Specialty pharmacies collect treatment data. They share helpful insights with doctors when needed. This information can show patterns, progress, or concerns in a patient’s treatment. It helps providers make clear treatment decisions.

Why Specialty Pharmacies Matter for Medication Access

Medication access is essential for patient health. Specialty pharmacies make that access smoother. They shorten approval times. They help manage costs. They give patients support during treatment. They make sure medication arrives safely and on time. Their work helps patients stay focused on recovery instead of stress.

The Impact on Long-Term Health

Specialty pharmacies help patients stay on their medication over the long term. Consistent treatment often leads to better health results. Patients feel more supported. They understand their medication better. They feel more prepared to manage their condition. This long-term structure improves quality of life.

Conclusion

Specialty pharmacies improve medication access in a clear and practical way. They guide patients through approval steps. They help manage high costs. They deliver safe medication support and steady communication. Their role makes treatment easier, faster, and more consistent. With this level of support, patients can follow their medication plan with confidence and stability.

How to Create Open-Plan Living in Older UK Homes Safely

Open-plan living has become a strong design choice in many UK homes. Older houses often have small rooms that block light and reduce usable space. A clear plan can help you create an open layout without putting your home at risk. This guide explains each step in simple, direct language. It focuses on structure, safety, design flow, and the role of architecture in older UK homes. Every section supports clear understanding and easy reading for both people and search engines.

Why Many Homeowners Choose Open-Plan Living

Open-plan layouts help people use space with more freedom. Families want open areas for cooking, relaxing, and social time. Older UK homes often have walls that separate each room. These walls can make the home feel dark or tight. Removing the right walls can fix this, but the work must follow safety rules. You should treat open-plan design as a structured plan built on safe choices.

How Architecture Shapes Open-Plan Living in UK Homes

Architecture sets clear limits on what you can remove or change inside a home. Many older houses in the UK were built with brick internal walls, timber floors, and load-bearing supports that shape how much you can safely open up a space. Understanding these original materials helps homeowners see which parts of the structure carry weight and which areas provide more freedom for layout changes. This is also why design-focused teams like dRAW Architecture, known for their innovative approach in South West London, place strong emphasis on studying the home’s existing framework before offering layout ideas. Their focus on structural logic ensures that any new concept still respects the building’s core stability.

A complete review of how your home was built makes the planning stage smoother and safer. When you understand the role of each wall, beam, and support, it becomes easier to evaluate open-plan options without risking the property’s integrity. Good preparation also reduces unexpected issues during construction and helps avoid unsafe work later. Safe open-plan design always begins with accurate assessments, thoughtful layout choices, and a clear understanding of how the original structure supports everyday living.

Understanding Load-Bearing Walls

A load-bearing wall holds the weight above it, such as floors, roof sections, or other walls. You must not remove a load-bearing wall without the right support. Many older UK homes use central walls to carry weight across the building. A safe open-plan project begins with a review from a qualified structural expert.

Signs a Wall May Be Load-Bearing

A wall may carry weight if:

  • It sits in the center of the home.
  • It aligns with beams or joists.
  • It sits under another wall.
  • It connects to the loft structure.

These signs guide you, but they do not replace a professional check. A trained expert confirms the structure so the project stays safe.

The Role of a Structural Engineer in Safe Open-Plan Living

A structural engineer checks weight paths and stress points. They calculate the beam size you need and confirm if other supports are required. This step keeps the home stable after the wall is removed. Many open-plan projects in older UK homes rely on steel beams. The engineer provides a clear plan so the contractor knows how to place and secure the beam.

Planning Permission and Building Regulations

Most open-plan changes inside the home do not need planning permission, but you must still follow building regulations. These rules cover strength, fire safety, and access. You need approval from building control to confirm the work meets the correct standard.

Key Areas Building Regulations Will Check

  • Strength and support
  • Fire safety
  • Beam placement
  • Escape routes
  • Impact on floors above

These checks protect the integrity of the home. They also give you peace of mind that your project meets the correct safety level.

Fire Safety in Open-Plan Spaces

Open-plan layouts change how smoke and heat move in the home. When you remove walls, smoke can spread faster. You must plan for safe escape routes. Many older UK homes use internal doors to slow smoke. When these doors are removed, you may need extra smoke alarms or fire-rated doors in other areas.

Ways to Improve Fire Safety

  • Install linked smoke alarms on each floor
  • Use fire-rated doors in hallways
  • Keep a clear path to exits
  • Ensure safe spacing between kitchen appliances and open areas

A clear fire safety plan protects both the home and the people inside.

Why Good Ventilation Matters

Older UK homes often struggle with airflow. When you open the space, airflow changes. Good ventilation helps control moisture, cooking odors, and heat. Without the right plan, an open kitchen can spread moisture into living areas. You need strong extraction fans, fresh air points, and balanced airflow.

Simple Ways to Improve Ventilation

  • Fit a strong kitchen extraction system
  • Use trickle vents in windows
  • Keep airflow routes open
  • Add plants to support air clarity

Proper ventilation keeps the space comfortable after the transformation.

How Lighting Affects Open-Plan Living

Open-plan layouts depend on smart lighting. A large space needs layers of light to support cooking, dining, and relaxing. Older UK homes often have limited natural light due to small windows. You can fix this with simple changes.

Strong Lighting Options for Open-Plan Spaces

  • Roof lights
  • LED ceiling spots
  • Floor lamps
  • Under-cabinet lights

These options help you manage light across the space without shadow-heavy areas.

Plumbing and Electrical Planning

Plumbing and electrical systems must fit the new open space. Older UK homes often use dated wiring and pipes. When you open the layout, you may need to upgrade these systems for safety and power load balance.

Important Points to Review

  • Power supply for kitchen appliances
  • Safe wire routes across open ceilings
  • Heating pipe placement
  • Water line rerouting for sinks

A clear systems review prevents future repair work and supports long-term safety.

How to Choose the Right Beam for the Opening

A steel beam supports the weight after you remove a wall. The structural engineer decides the size. Many UK homes use RSJ beams for open-plan construction. The beam must fit securely in the walls on both ends. Proper padding, plates, and alignments are required to carry weight safely.

Steps in Safe Beam Installation

  1. Open a small section of the wall to check structure
  2. Support the area with temporary props
  3. Fit the steel beam
  4. Secure the beam ends in strong wall pockets
  5. Recheck weight distribution

This simple sequence keeps the home stable through each stage.

Protecting Older Floors During Open-Plan Builds

Many older UK homes have timber floors that are sensitive to heavy work. You must protect the floor when tools, beams, and dust enter the space. Use strong boards to cover the surface. Keep heavy tools away from weak areas. After construction, check for squeaks or dips.

Insulation and Sound Control

A large open space can create echo or heat loss. Insulation helps manage sound and indoor temperature. You can add insulation in floors, ceilings, and walls around the space. Rugs, curtains, and soft furniture help reduce echo.

Creating a Smooth Interior Flow

An open-plan space needs clear zones. You can use flooring changes, soft colors, rugs, or furniture lines to divide areas. Architecture plays a major role in how these zones connect. Keep the main pathways wide and free from clutter. This helps the home feel open but still organized.

Choosing the Right Materials

Older UK homes often mix brick, plaster, and timber. Choose materials that match the original structure. Smooth walls, clean ceiling lines, and simple flooring help unify the space. You can keep some features like beams or brick sections to add character.

Working With a Skilled Contractor

A skilled contractor ensures safe construction. They follow the structural plan and meet building regulations. They also protect the home during the project. Ask for past work samples of open-plan conversions in UK homes.

Cost Planning for Open-Plan Projects

Prices vary based on wall type, beam size, and contractor rates. Expect to budget for:

  • Structural engineer
  • Building control
  • Beam supply
  • Labor
  • Electrical and plumbing updates
  • New finishes

A clear budget keeps the project on track.

Final Thoughts

Safe open-plan living in older UK homes depends on smart planning, strong support, and clear structure checks. A good design improves light, space, and movement. Architecture sets the foundation, while skilled work brings the idea to life. With the right steps, you can transform your home into a bright, open, and safe space that fits modern living needs.

How to Organize a Small Space Before Cleaning

A small space can feel crowded fast, so clear planning helps you work with ease. Good organization also supports deep cleaning because it gives you open areas, fewer obstacles, and a simple path to follow. This guide explains clear steps that help you sort items, reduce clutter, and prepare your space. Each section uses direct language, short sentences, and an easy flow that supports clear reading and strong NLP structure.

Why You Should Organize Before You Start Deep Cleaning

Organizing a small space before starting any deep-cleaning routine saves time and keeps the process simple. It stops you from shifting the same items over and over again and lets you see the true condition of shelves, counters, and corners. When everything is sorted, you notice dust, stains, and hidden spots that are easy to miss in a cluttered room. This step also reduces stress because you work with a clear path and a focused plan.

A clean setup supports stronger results, especially when you want every surface to look fresh. Many homeowners follow this method and pair it with guidance from RMS Cleaning, a trusted, family-owned business proudly serving New Jersey. Their approach highlights how proper organization helps cleaning tools reach every blocked area and improves overall efficiency. When the space is prepared, each task becomes faster, more effective, and more satisfying, giving your home a neat and healthy look.

Start With a Simple Plan

A simple plan helps you move with purpose. You decide what you want to clear first and what you will handle later. You avoid confusion and make the space easy to manage.

Identify the Zones

Divide the space into small zones. A zone can be a shelf, a drawer, a corner, or a table surface. You work on one zone at a time. This stops you from feeling overwhelmed and helps you keep steady progress. Clear steps also give you quick wins, which keep you motivated.

Set a Clear Goal for Each Zone

Give each zone a clear goal. For example, you might want to clear a shelf for storage or open space for cleaning tools. A simple goal helps you stay focused. You avoid mixing tasks, and you keep your work flow steady.

Remove All Visible Clutter First

Clutter takes up space and blocks your view. You need a clear area to start deep cleaning, so the first step is to remove all loose items.

Take Out Items You No Longer Need

Pick up each item and decide if you want to keep it. If you do not use it, place it in a donation box or a trash bag. Short decisions stop the process from slowing down. You make space fast and prepare the room for cleaning. Your goal is not perfection. Your goal is to create open space.

Group Similar Items Together

Place similar items in small groups. For example, group books, cables, papers, and small tools. This helps you understand how much of each category you have. You can choose storage options later with a clear idea of your needs.

Create a Temporary Holding Area

A small space becomes tight fast, so create a temporary holding area. This area gives you space to move items without mixing tasks.

Use a Corner or an Empty Box

Choose a clear corner, a small table, or an empty box. Place items there so you can focus on cleaning one zone at a time. A holding area keeps your workflow smooth. You avoid stacking things all over the room, and you keep the space safe.

Keep the Holding Area Simple

Do not turn this area into another clutter zone. Place only items that belong there. Move them out when you finish organizing each zone. This helps you avoid confusion later.

Clear Surfaces Fully Before Deep Cleaning

Deep cleaning requires full access to surfaces. You cannot reach dust, stains, or small gaps if items remain on the surface.

Empty Shelves, Tables, and Counters

Take everything off shelves, tables, and counters. Even small items should move. A clear space helps you see the true level of dirt. You also avoid missing areas that gather dust.

Check Hidden Spots

Small spaces often have hidden corners. Check behind items, under small boxes, and near wall edges. Clear these spots before deep cleaning to avoid leaving dirt behind.

Sort and Label Items

Sorting makes future cleaning easier. Labels give you quick access to the things you need.

Use Simple Categories

Choose simple categories such as papers, clothes, tools, small appliances, and personal items. You can refine these categories later. The goal is quick structure, not perfect detail.

Label Boxes or Containers

Use small labels to mark boxes or bins. Labels help you place items back in the right spot after deep cleaning. You avoid future clutter and keep your space easy to maintain.

Make Space for Cleaning Tools

You need enough room for cleaning tools like mops, sprays, cloths, and vacuum attachments. Prepare this space before deep cleaning.

Set Aside a Tool Basket

Use a small basket or bag for your tools. Place it near the working area. This helps you clean fast without searching for items. Simple access keeps your pace steady.

Keep Only What You Need

Avoid placing too many cleaning items in your basket. Keep it simple. Choose items for dust, spills, and surface cleaning. Fewer items mean less confusion.

Use Vertical Space Wisely

Small rooms need smart storage options. Vertical space helps you organize without blocking deep cleaning.

Add Hooks or Small Shelves

Hooks and light shelves open up room on the floor. You can place light items there and free up space for cleaning. These options prevent clutter and support clean movement.

Keep Frequently Used Items Within Reach

Place items you use often at eye level. Items you rarely use can go higher. This simple rule keeps your space easy to manage during daily routines.

Prepare the Floor for Deep Cleaning

The floor gathers dust, crumbs, and dirt. Before deep cleaning, make sure the entire floor is open.

Move Small Furniture if Possible

Shift small furniture pieces away from walls or tight corners. This exposes hidden dirt. You avoid missing any spot during the deep cleaning process.

Pick Up Loose Items

Shoes, bags, cables, and small objects should move to the holding area. A clear floor supports smooth sweeping, mopping, or vacuuming.

Build a Simple Storage System After Organizing

Once everything is sorted, give each item a clear home. This keeps your space clean long after the deep cleaning.

Use Containers That Fit the Space

Choose small containers that match your shelf or drawer size. Oversized storage makes the room feel tight. Small containers help you stay organized.

Keep Everyday Items Easy to Access

Do not hide daily-use items behind stacks of boxes. Keep them in front or at a reachable level. This prevents mess from building up again.

Final Check Before You Begin Deep Cleaning

A final check prevents interruptions during your deep cleaning.

Confirm All Surfaces Are Clear

Look at every shelf, table, and counter. Make sure nothing blocks your cleaning path. Full access leads to better results.

Confirm Tools Are Ready

Check your cleaning tools. Make sure everything is nearby and easy to reach. This helps you clean without losing momentum.

Conclusion

Organizing a small space before deep cleaning creates a strong setup for better results. You remove clutter, open each zone, and build a simple system that supports easy maintenance. A clear space helps you clean faster and with more accuracy. With this step-by-step approach, your room stays easy to manage, and your deep cleaning becomes smooth, direct, and effective.

How to Build Good Oral Hygiene Habits That Actually Stick

Good oral hygiene helps you keep your teeth healthy, your gums strong, and your smile clean. Strong oral hygiene habits also help reduce the risk of toothache, gum problems, and long-term dental care costs. Many people want better habits, but they struggle to keep a routine. This guide explains simple, clear steps that help you build habits that last. Every section uses direct language so you can follow each step with ease.

Why Oral Hygiene Matters

Good oral hygiene keeps your mouth clean. It helps you avoid toothache and infections. It also protects your gums and reduces the need for emergency dental care. These benefits make it easier for you to enjoy daily life without pain or discomfort.

How Oral Hygiene Affects Your Health

Poor oral hygiene can lead to plaque build-up. This build-up can weaken enamel and irritate your gums. It can also cause bad breath, cavities, and gum disease. Good habits stop these problems before they develop.

How Oral Hygiene Supports Long-Term Dental Care

Creating a welcoming and comfortable experience is essential in dental care because it helps patients feel relaxed and confident during their visits. When people trust their environment, they are more likely to maintain regular appointments and follow the guidance they receive. Many individuals also look for reliable local options such as Dental Clinic Burwood, where consistent care and helpful advice support long-term oral health. This natural placement of relevant references is also effective for SEO and strengthens link-building strategies.

A clean mouth needs fewer treatments, and this simple idea remains central to preventive dentistry. Dentists often notice that people who follow strong daily oral hygiene routines require fewer fillings, fewer extractions, and far fewer deep-cleaning procedures. These steady habits protect teeth, save time, and reduce future costs. When patients understand how small daily actions lead to long-lasting benefits, they make better choices and enjoy healthier smiles for many years.

Build a Simple Brushing Routine

A clear routine helps you avoid confusion and keeps your daily task easy to follow. Consistency is the key to strong oral hygiene habits.

How to Brush the Right Way

Brush for two minutes. Use gentle pressure. Move the brush in small circles so the bristles reach all areas. Cover the front, back, and chewing surfaces of each tooth. Brush your tongue to remove bacteria and improve breath.

Choose the Right Toothbrush

Pick a soft-bristle brush. A soft brush protects your enamel and gums. Replace your toothbrush every three months or when the bristles bend.

Use the Right Toothpaste

Pick fluoride toothpaste. Fluoride strengthens enamel and reduces the risk of cavities. You do not need fancy formulas. A simple fluoride option works well.

Add Flossing to Your Routine

Flossing removes food and plaque from areas your brush cannot reach. It is one of the most effective oral hygiene habits for gum health.

How to Floss Correctly

Use a calm, steady motion. Slide the floss between each tooth. Curve the floss around the base of the tooth. Do not snap the floss, as sharp movements can irritate gums. Move to a fresh section of floss for each gap.

Why Flossing Helps Reduce Toothache

Bacteria between teeth often cause pain. When you remove debris, you limit the chance of gum swelling and decay. This reduces the chance of toothache and infections.

Use Mouthwash for Extra Protection

Mouthwash helps you reach areas that brushing and flossing miss. It reduces bacteria and freshens breath.

Pick a Mouthwash That Supports Oral Hygiene

Choose a fluoride or antibacterial mouthwash. Both types help protect your teeth by reducing harmful bacteria. Do not use mouthwash straight after brushing. Wait at least 20 minutes so the fluoride from your toothpaste stays on your teeth for longer.

Build Habits That Last

Strong habits come from daily practice. You do not need to aim for perfection. You only need to follow a simple routine each day.

Set a Clear Schedule

Brush once in the morning and once at night. Pick fixed times so your brain connects the action with your routine. This makes it easier to repeat the habit each day.

Start with Small Steps

If you struggle to floss every day, start with three days each week. Add more days when you feel ready. Simple steps make the habit easier to maintain.

Track Your Progress

A habit tracker helps you stay consistent. Use a small calendar. Mark each day you complete your routine. This visual record motivates you to keep going.

Eat Foods That Support Oral Hygiene

Your diet plays a strong role in your oral health. Certain foods help your teeth, while others cause problems.

Foods That Help Your Teeth

Eat cheese, yoghurt, nuts, apples, and leafy greens. These foods support enamel strength, clean your teeth as you chew, and support gum health.

Foods That Increase the Risk of Toothache

Sugary snacks, sticky sweets, and acidic drinks weaken enamel. When enamel weakens, your teeth become sensitive. This can lead to toothache or cavities. Limit these items to protect your oral hygiene habits.

Drink Water to Support Clean Teeth

Water helps clean your mouth and keeps saliva active. Saliva protects your enamel and helps you chew, swallow, and speak with comfort.

How Water Supports Oral Hygiene

Each sip of water helps wash away food. It also reduces the effect of acidic drinks and stops bacteria from spreading. Drink water after meals to reduce plaque build-up.

See Your Dentist Regularly

Check-ups help you avoid future problems. A dentist can spot early signs of decay or gum issues before you feel pain.

What Happens During a Check-Up

A dentist checks your gums, teeth, and bite. They may take X-rays to spot hidden issues. They also give advice based on your oral hygiene habits and needs.

Why Regular Visits Support Good Habits

Scheduled visits remind you that your routine matters. They also give you confidence that your progress is on the right path. Regular dental care reduces sudden problems like toothache or swelling.

Teach Children Simple Oral Hygiene Habits

Children learn by watching others. If you follow a clear routine, they copy that behaviour.

Make Brushing Simple for Children

Use a small brush with soft bristles. Brush beside them. Let them try on their own after you show them the correct method. Praise their progress so they enjoy the routine.

Help Children Avoid Toothache

Limit sugary snacks. Give them water with meals. Teach them to brush twice a day so their habits become natural.

Keep Your Oral Hygiene Routine Easy

Your routine must feel simple. When a routine feels simple, your mind accepts it faster.

Remove Barriers

Place your toothbrush, toothpaste, and floss in one easy location. Keep your mouthwash nearby. When everything is in one spot, you follow your routine without delay.

Use Reminders

Place a small note on your bathroom mirror or set a phone alert. Simple cues help you repeat the habit daily.

The Goal: Oral Hygiene Habits That Stick

Good oral hygiene habits protect your teeth, reduce toothache, and support long-term dental care. Clear actions, simple routines, and steady practice help you build habits that stay with you. You do not need expensive products. You need consistency, clean tools, and a calm approach.

When you follow these steps, your oral hygiene improves, your routine becomes natural, and your confidence grows. Your teeth stay strong, your smile stays clean, and your daily life becomes more comfortable.

Why You Shouldn’t Ignore a Sudden Toothache

A sudden toothache can disrupt your entire day. The pain can start with a light sting or sharp pulse, but it often becomes stronger if you leave it untreated. Many people delay care because they hope the pain will fade. In most cases, the pain signals a deeper issue that needs proper treatment. Quick action protects your dental health and prevents bigger problems. This article explains why you should act fast, how proper dental care helps, and what happens if you ignore the warning signs.

What a Sudden Toothache Really Means

A sudden toothache rarely appears without a cause. Your tooth sends pain signals when something is wrong. The pain may rise from infection, tooth decay, gum disease, or injury. Some people only feel discomfort while eating, while others feel pain even at rest. Pain is your body’s clear message that you need treatment. If you delay care, the issue grows.

Common Causes of Sudden Pain

Different problems can trigger pain, but these are the most common:

Tooth Decay

Tooth decay develops when bacteria gradually erode the tooth’s outer surface, creating small openings that allow damage to spread. As the decay moves deeper, it begins to irritate the inner nerve, which often causes sharp, throbbing, or lingering discomfort. Many patients visit Indental Castle Hill, a trusted Castle Hill dentist, after noticing increased sensitivity or early signs of enamel breakdown. At this stage, treatment is usually simple and prevents further complications.

However, when decay progresses unchecked, it reaches the dentine and pulp, where inflammation becomes more severe. This deeper level of decay results in stronger, more persistent pain that may interrupt eating or sleeping. In advanced cases, restorative procedures become necessary to save the tooth and stop the infection from spreading. Understanding the early symptoms and seeking timely care helps maintain long-term oral health and reduces the need for extensive treatment.

Infection

A tooth infection can create strong pressure and swelling. Infection often builds inside the tooth or gum. Many people try home remedies, but infection needs professional dental care. Without treatment, the infection can spread to the jaw or face.

Cracked Tooth

A crack can form after biting hard food or due to injury. The crack exposes the inner layer and causes sudden pain. Some cracks are small, but others reach the nerve. Only a dentist can judge the depth and choose the right treatment.

Gum Disease

Inflamed gums pull away from the teeth, exposing sensitive roots. This exposure leads to pain. Gum disease also weakens the supporting bone. Early gum care can stop the issue before it becomes severe.

Why You Should Never Delay Treatment

Pain may fade for a short time, but the cause still remains. Quick treatment prevents more damage and reduces the need for complex procedures. If you ignore the pain, the situation often becomes worse.

Pain Often Spreads

A small problem becomes larger with time. A toothache can affect your jaw, ear, or head. You may find it hard to focus, sleep, or eat. This unnecessary struggle ends with proper dental care.

Infection Can Become Dangerous

An untreated infection grows fast. The swelling may reach the jaw or face. In rare cases, it can move to other parts of the body. Early treatment stops this risk.

You May Lose the Tooth

Deep decay or severe infection can destroy the tooth structure. A dentist can often save the tooth if you seek help early. If you delay care, the tooth may reach a stage where removal is the only choice.

Treatment Becomes More Costly

A simple filling costs far less than a root canal or tooth extraction. Early action saves both your health and your finances.

Signs That Your Toothache Needs Immediate Help

A sudden toothache is serious, but some symptoms demand urgent care.

Strong and Constant Pain

If the pain continues even without chewing, the nerve may be exposed or infected. This needs fast treatment.

Swelling

Swelling around the face, cheek, or gum signals a possible infection. Swelling does not improve with home remedies. You need professional dental care.

Fever

A fever with tooth pain suggests infection. This is a sign that you should visit a dentist without delay.

Bad Taste or Discharge

A bitter taste or small discharge may point to an abscess. This requires urgent dental treatment.

How Proper Dental Care Helps You Recover

Good dental care does more than reduce pain. It solves the root cause and protects long-term oral health. A dentist will examine the tooth, take X-rays if needed, and guide you to the correct treatment.

Fillings

If decay is caught early, a filling restores the tooth. This stops bacteria from spreading and ends the pain quickly.

Root Canal

A root canal clears infection inside the tooth. After cleaning, the dentist seals the space. This treatment saves the natural tooth and prevents future pain.

Extraction

If the tooth cannot be saved, removal prevents further damage. After extraction, the dentist may guide you about options like implants or bridges.

Gum Treatment

If gum disease caused the pain, cleaning and gum care will help. Early treatment protects the bone and prevents future discomfort.

Simple Home Steps While You Wait for a Dentist

Home steps cannot replace treatment, but they may reduce temporary discomfort.

  • Rinse your mouth with warm salted water.
  • Use cold pressure on the cheek to reduce swelling.
  • Take basic pain relief if recommended for you.
  • Keep the aching side clean and avoid very hot or cold food.

These steps only offer short-term comfort. You still need proper dental care.

How You Can Prevent Future Toothaches

A few simple habits protect your teeth and reduce your risk.

Brush Twice Daily

Brush gently with fluoride paste. This removes harmful bacteria.

Floss Every Day

Floss reaches areas your brush cannot clean. This reduces decay and gum issues.

Eat Smart

Limit sugar and sticky foods. Choose fresh fruits, vegetables, and clean snacks.

Visit Your Dentist Regularly

Regular check-ups allow early detection. Your dentist can fix small issues before they become painful.

Why Early Dental Care Protects Your Health

A healthy mouth supports your overall health. Infection and inflammation in the mouth can affect other parts of the body. People often ignore these links, but they matter. Early care saves you from bigger problems later.

Pain-Free Living

A quick visit can restore comfort and make daily life easier.

Strong Teeth for Longer

Proper care strengthens your teeth so they last many years.

Peace of Mind

Knowing your teeth are healthy removes stress. You avoid sudden pain and urgent visits.

Final Thoughts

A sudden toothache is a warning you should never ignore. Pain means your tooth needs attention. Early treatment protects your health, reduces cost, and prevents long-term damage. Good dental care keeps your teeth strong and your mouth healthy. Make a habit of simple care, regular check-ups, and quick action when pain begins. Your teeth will stay stronger, and your daily life will feel much better.

How to Plan a Stylish Renovation in a UK Conservation Area

Planning a stylish renovation in a UK conservation area needs clear steps and smart choices. A conservation area protects buildings, streets, and landscapes with historic value. You can still introduce Modern Design, but you must respect the character of the location. UK Architects often guide homeowners through this process, as they understand local rules and design expectations. This guide explains how to plan well, avoid delays, and create a home that looks fresh while still fitting the area.

Understand What a Conservation Area Means

A conservation area keeps the local setting safe from changes that may weaken its historic value. Local councils use these areas to protect old buildings, street layouts, and shared views. You can still carry out a Stylish Renovation, but you must follow set rules.

Check the Conservation Area Status of Your Property

Before any work, confirm whether your home sits inside a conservation area. You can check through the local council website. This helps you understand limits on extensions, new materials, window styles, or roof shapes.

Know the Local Council Guidelines

Local councils publish clear rules that guide changes in conservation areas. These rules explain:

  • What type of extensions are allowed
  • What building materials you can use
  • What changes need planning permission
  • What you must keep unchanged

Print these rules or save them for reference during the design phase.

Work with Skilled UK Architects

Hiring experienced UK architects gives you a clear advantage when planning any home improvement project. They understand conservation rules, building standards, and the practical steps needed to move from an idea to a finished design. When you work with Molecule Designs, you benefit from a team that blends technical knowledge with creative thinking, helping you develop a modern design plan that respects planning requirements while still elevating the look and function of your property.

This balanced approach makes the entire process smoother and more predictable. Skilled architects assess your space, identify opportunities for improvement, and recommend layouts that add value without creating compliance issues. Their guidance ensures that each stage, from initial sketches to final approval, aligns with local regulations and your personal vision, giving you a confident path forward for your renovation plans.

Why You Should Work with an Architect

An architect helps you:

  • Create designs that fit local rules
  • Prepare drawings for planning approval
  • Select materials that match the area
  • Communicate with the council
  • Avoid mistakes that lead to delays

They balance style with planning needs, which is important for a Stylish Renovation.

Choose an Architect with Conservation Experience

Select someone who has worked on similar homes. Ask for examples of past projects. Look for architects listed on trusted UK professional bodies. Their previous conservation work shows how well they can shape a design that blends old and new features.

Build a Clear Renovation Plan

A renovation project needs a simple and direct plan. This avoids confusion and helps the project move smoothly.

Decide What You Want to Improve

List the spaces you want to change. Common renovation aims include:

  • Making rooms brighter
  • Opening closed spaces
  • Improving heating efficiency
  • Adding an extra room
  • Updating the interior layout

Write tasks in order of priority. This helps the architect create a Modern Design plan that supports your main goals.

Confirm What Changes Need Permission

In a conservation area, small changes may also need approval. Check with your architect or the council. Windows, doors, external walls, and rooflines often need permission, even if the change seems small.

Prepare Drawings Early

Ask your architect to prepare drawings early in the project. Accurate drawings help you:

  • Understand how the home will look after renovation
  • Discuss ideas with the architect
  • Share the design with the planning team
  • Avoid last-minute changes that cost time and money

Drawings help everyone visualise the same plan.

Respect Local Character While Adding Modern Design

A Stylish Renovation is possible even in a protected area. You can add Modern Design features, but they must work with the building style and local setting.

Keep the Main Character Features

Your home may have old brickwork, timber frames, stone walls, or traditional windows. Try to keep these features. They form part of the street’s charm and help your plan move through approval faster.

Use Modern Design with Care

Modern Design can look clean and fresh. You can use it for:

  • Interior layouts
  • Lighting
  • Flooring
  • Kitchen shapes
  • Bathroom upgrades

If you want modern elements outside, such as metal frames or large glass panels, your architect will guide you on what is acceptable in the conservation area.

Match or Complement Materials

The council often prefers materials that match the old building. Brick colour, roof tiles, and external paint must suit the area. You can still use modern materials, but they must complement the older ones. Balanced design helps you meet approval requirements.

Submit a Strong Planning Application

A strong application increases your chances of quick approval. It should be clear, complete, and aligned with local rules.

Prepare All Documents

Your architect helps prepare:

  • Site plans
  • Elevation drawings
  • Material descriptions
  • Heritage statements
  • Design explanations

These documents show how your Stylish Renovation will support the conservation aims.

Explain the Design Choices

A short explanation helps the council see your plan clearly. Describe:

  • What you plan to change
  • Why the change improves the home
  • How the design respects the area
  • How materials fit the location

Simple language helps the planning officer understand your aims.

Respond Quickly to Council Queries

If the council asks for changes or extra details, reply quickly. Delays often occur when homeowners ignore update requests. Quick responses speed up the approval process.

Plan the Build Phase with Care

Good planning is important during construction. A conservation area may require careful handling due to old materials or narrow streets.

Choose a Contractor with Experience

Pick a contractor who has worked in conservation areas. They understand:

  • How to handle old walls
  • How to manage waste
  • How to protect local features
  • How to work safely in tight spaces

Experience reduces mistakes.

Protect Neighbouring Property

Homes in conservation areas often sit close together. Make sure your team protects:

  • Shared walls
  • Old fences
  • Pavements
  • Trees or plants

Respecting the surroundings maintains good relations with neighbours.

Follow the Approved Plan

Do not make sudden changes once work starts. Unapproved changes may break planning rules. If you must change something, ask your architect first. They will guide you on whether a new approval is needed.

Add Finishing Touches That Improve Style and Comfort

The final stage focuses on the living experience. You can add small touches that make the space feel balanced.

Use Clean and Simple Interior Choices

Modern Design often uses clean lines, open space, and natural light. You can add:

  • Clear glass interior doors
  • Slimline fixtures
  • Neutral colours
  • Subtle lighting strips

These elements create a fresh look without overpowering the historic structure.

Improve Energy Efficiency

Many old homes lose heat. Your renovation is a chance to improve comfort. Consider:

  • Proper insulation
  • Efficient heating systems
  • High-quality glazing
  • Smart lighting controls

These updates reduce energy bills and increase comfort.

Keep the Exterior Subtle

A good Stylish Renovation blends with the area. Keep exterior changes simple and respectful. Subtle choices help the home stay in harmony with its surroundings.

Final Thoughts

A Stylish Renovation in a UK conservation area needs clear steps, simple planning, and respect for local rules. Modern Design can still shine, but it must work with historic character. Skilled UK Architects guide you through the process with steady support. Plan with care, follow local guidance, and aim for a design that feels fresh while still respecting the past. This approach helps you create a home that looks smart, works well, and fits its surroundings with ease.

Why Retreats Help Couples Understand Each Other’s Inner Worlds

Retreats give couples a calm place to slow down, speak openly, and understand each other with clarity. Many partners live busy lives that leave little space for deep conversations. A relationships retreat creates a quiet setting where both partners can observe their own thoughts, share honest feelings, and reconnect with simple communication. This article explains how retreats support growth, trust, and emotional insight. It follows a clear and direct style so readers can absorb each idea without confusion.

The Purpose of Retreats for Couples

Retreats help couples focus on their bond without daily stress. Each session encourages both partners to speak in a clear voice, listen with care, and express their needs in simple words. Many couples find it hard to discuss emotional topics at home because of noise, tasks, and pressure. A relationships retreat removes distractions and gives each partner space to reflect.

How Retreats Create Safe Emotional Space

A retreat promotes a safe and calm environment. Couples feel free to express fears, share hopes, and discuss patterns that affect their bond. A quiet room, peaceful surroundings, and guided steps help both partners speak in a relaxed way. This steady setting supports honest dialogue, which helps partners understand each other’s inner worlds with more ease.

Encouraging Open Conversation

Retreats guide couples to speak directly about what they feel, think, and expect, and this honest flow of communication becomes even stronger when framed within a well-designed relationships retreat. By creating a calm setting, partners feel safe enough to express emotions they normally avoid. Many couples skip difficult conversations because they fear tension, judgment, or rejection. When guidance is provided in a structured environment, it becomes easier for each person to share what is happening inside without feeling pressured or misunderstood.

Structured sessions also help break long-standing communication patterns. A clear format encourages each partner to wait, listen, and respond with simple and supportive language. This reduces unnecessary conflict and builds trust step by step. When couples follow this process, they develop better listening habits, improve emotional awareness, and build a stronger, more stable connection that lasts beyond the retreat.

Reducing Emotional Barriers

Stress, old arguments, and unclear communication can create emotional barriers. Retreats help couples soften these barriers by slowing the conversation. Partners learn how to explain actions, reactions, and concerns in a gentle manner. This helps both people feel seen and heard, which brings relief and improves understanding.

Understanding Each Other’s Inner Worlds

Every person carries thoughts, memories, and reactions shaped by past experiences. Retreats help couples identify these inner layers. When partners understand why the other reacts in a certain way, they respond with more patience.

Learning Emotional Patterns

Each partner has emotional patterns. These patterns shape how a person deals with conflict, affection, and stress. Retreats help couples recognize these patterns. For example, one partner may shut down during conflict because of past experiences. The other may raise their voice out of fear that they are being ignored. Understanding these inner reasons helps remove blame and invites empathy.

Building Emotional Awareness

Retreats support emotional awareness by guiding couples through simple reflection steps. Partners learn to identify their feelings with clear labels. Instead of saying “I feel bad,” they learn to say “I feel hurt,” “I feel stressed,” or “I feel alone.” This clarity helps both partners respond in a supportive way.

Strengthening Communication Skills

Couples often struggle with communication because messages get lost in emotion. A relationships retreat teaches partners how to share thoughts without confusion.

Clear Expression

When couples learn to use clear statements, misunderstandings drop. Retreats teach couples to speak using simple subject-verb-object sentences. This clarity improves the entire conversation. Clear speech stops arguments from escalating and turns the discussion into teamwork.

Active Listening

Listening is a crucial skill. Retreats teach partners to listen without interrupting, judging, or planning their response. This helps one partner feel respected and valued. When both people listen with focus, emotional trust strengthens and conversations feel lighter.

Building Trust Through Shared Experiences

Retreats give couples shared experiences that strengthen their connection. Spending time in a calm setting, completing exercises, and talking openly builds trust. This trust creates a strong foundation for daily life.

Rebuilding Connection

Many couples arrive at a retreat feeling distant. A retreat helps them rebuild their bond step by step. Guided sessions, shared tasks, and quiet moments help both partners feel close again. When couples feel connected, they communicate better and argue less.

Creating New Memories

Retreats give couples positive memories. These memories help replace stressful experiences with warm ones. When partners remember these moments, they approach future challenges with more unity.

Improving Problem-Solving Skills Together

Retreats help couples learn simple steps for solving problems. Many conflicts repeat because partners do not know how to break the cycle. Retreats teach methods that help couples solve issues without stress.

Identifying the Root Issue

Arguments often start from surface triggers. A retreat helps couples look deeper to find the real cause. When partners understand the root issue, solutions feel more natural. This prevents future conflicts and brings more peace.

Working as a Team

When couples learn to work as a team, life becomes easier. Retreats guide partners to share roles, divide tasks, and support each other. This teamwork increases respect and reduces resentment.

Strengthening Emotional Safety

Emotional safety is essential for a healthy relationship. A retreat helps couples build emotional safety by teaching calm communication and steady support.

Practicing Calm Responses

Partners learn how to stay calm during intense conversations. Calm responses reduce fear and stop defensive reactions. This makes each partner feel safe enough to share their inner world.

Offering Reassurance

Retreats teach partners how to offer simple reassurance. A supportive word, a calm tone, or a gentle gesture can ease tension. These small actions create emotional comfort and increase closeness.

Encouraging Growth After the Retreat

The goal of a retreat is long-term growth. Couples leave with tools they can use daily. These tools help them maintain harmony and continue understanding each other.

Daily Communication Routines

Many retreats encourage couples to practice short daily check-ins. These routines help partners stay connected. A simple five-minute talk each day helps couples prevent miscommunication.

Continued Emotional Insight

As couples continue to apply what they learned, their emotional insight grows. They become more aware of their own reactions and the feelings of their partner. This ongoing insight strengthens the relationship over time.

Why Retreats Are a Strong Choice for Couples

Retreats offer a simple and effective path for couples who want a deeper understanding of each other. Each session promotes open communication, clear expression, and emotional awareness. Couples gain insight into their inner worlds and build habits that support long-term stability. A relationships retreat gives partners space to improve communication, rebuild trust, and create a stronger and healthier bond. In a calm and open setting, couples learn to understand each other with compassion, clarity, and steady support.

Design a site like this with WordPress.com
Get started